Track Splitting and Editing Tutorial
This tutorial is designed to be interactive. You will need to download a short demonstration file in order to practice the techniques described below.
At various points you will see a  symbol. Follow the instructions at these points to practice the techniques described.
- Overview of Track Splitting
- Track View
- Editing Track Boundaries
- Adding Fades and Silence
- Selecting Tracks
- Playing Tracks
- Re-Scanning for Tracks
- Manually Adding and Removing Tracks
- Cueing Tracks
- Adding Tags to your Tracks
- Saving and Naming Files
- Using Command Line Encoders
Overview of Track Splitting
Usually when you record an album you will want to split it into separate track files. This will enable your CD player or your music library software to go to a particular track when requested to do so.
Splitting tracks for CD burning is complicated by the fact that audio CD's are laid down in packets of 588 samples. Each packet contains one 75th of a second of audio. Therefore when you create your individual track files, they should consist of an exact integer multiple of 588 samples. If this condition is not met, then the CD burner will need to truncate the file or pad it out with silence. In either case, this may cause an undesirable glitch at the end of a track.
The red book standard for audio CD's stipulates a 2 second silent lead-in to each track. If you burn your CD's to this standard (the default for most CD burners), you will probably want to cut out some of the silence between the tracks on your vinyl or cassette sources. Otherwise, the gap between tracks will be extended by the extra 2 seconds and will probably sound too long.
Sometimes however, you will want to produce tracks that play seamlessly from one to the next. To do this, most CD burning packages have a 'Disc-at-Once' mode. In this mode, the tracks follow on from each other without any gap. If you use this mode, it is essential that you do not remove any of the waveform between tracks. Otherwise, when the tracks are put back together on the CD, there could be glitches at the track transition points.
You may also want to add fade-in or fade-out to your tracks to make them sound more professional. Wave Corrector's track management functions ensure you can create your tracks with confidence that your tracks will sound just the way you planned them.
Track View
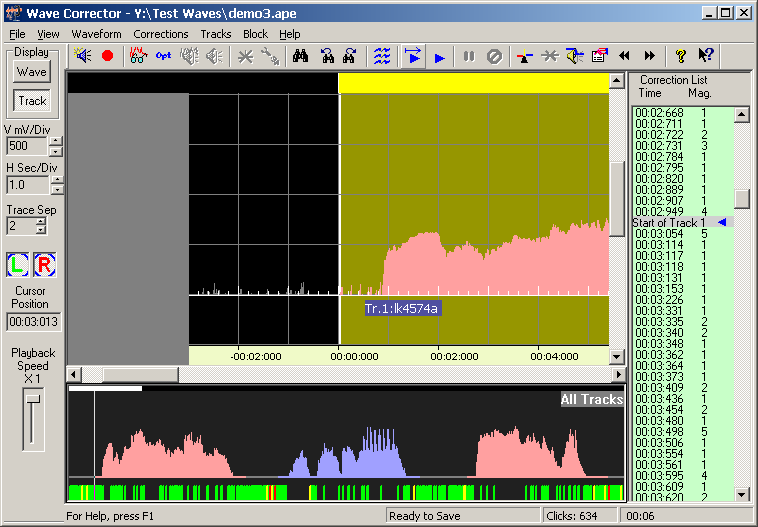
Track editing in Wave Corrector is done in Track View. This view is illustrated below. Wave Corrector switches automatically to Track View when you select a track boundary. To practice using this view, you will need the sample file demo3.ape. If you have not already done so, download the file at the following link: demo3.ape. Right click on the link and select the option 'Save Target As...'
Editing Track Boundaries
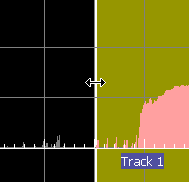
Once loaded in, Wave Corrector allows you to easily step between tracks and to audition the effect of any edits you make.
Adding Fades and Silence
As well as editing the position of boundaries, you can also add a fade-in or fade-out sections and you can also add a period of silence to the begging or end of a track.
Selecting Tracks
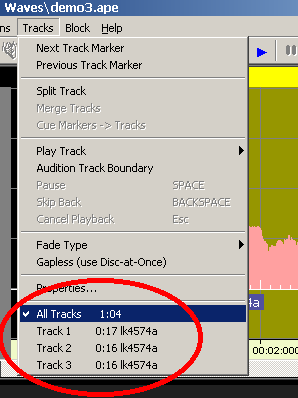
Once a file has been split into two or more tracks, Wave Corrector allows you to select individual tracks for playing. Alternatively, you can select the entire file and play that.
Playing Tracks
Re-Scanning for Tracks
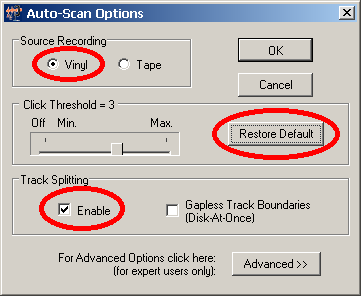
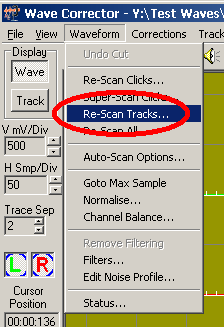
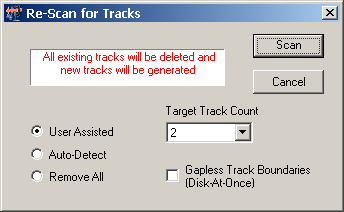
Sometimes, the program will fail to find the correct track boundaries. This can happen, for example if there is a very quiet section within a track. This can be mistaken for a track boundary. In this case, you can give the program a target number of tracks to find. This will increase the likelihood that the correct boundaries will be found.
Manually Adding and Removing Tracks
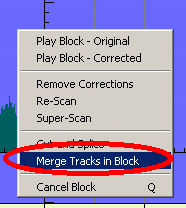
Wave Corrector has two commands, Merge Tracks and Split Track that allow you to remove track markers that the program creates or to manually add new ones.
Cueing Tracks
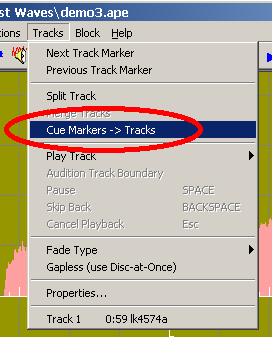
You can also cue track boundaries 'on the fly' during track playback.
Adding Tags to your Tracks
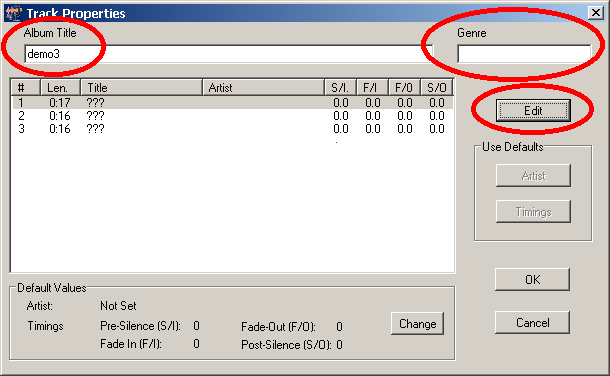
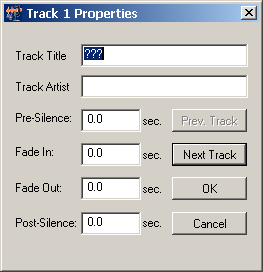
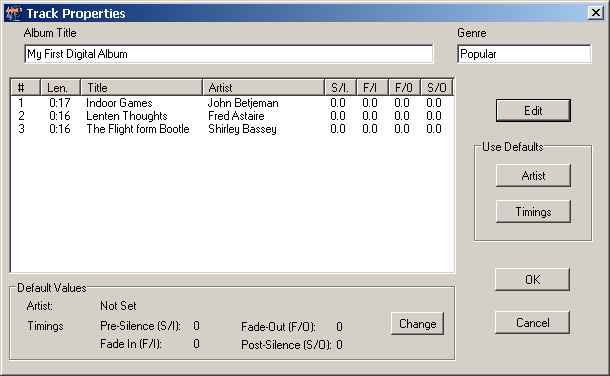
Track Tags are text labels that you associate with your tracks. In Wave Corrector you can add the following tags:
- Title
- Artist
- Album
- Genre
Tags can be used to generate file names when you save your work. In addition tags are automatically saved in .ogg files, .ape files and .ses session files.
Saving and Naming Files
Once you've processed and tagged your files, you're ready to save them.
Files can be saved in both compressed and uncompressed formats. Compressed formats are used to reduce the amount of disk space taken up by your files. As such, you should compressed formats if you intend to keep a music library on hard disk, or if you are archiving your recordings. If you are simply transferring your tracks to audio CD, then you should use the uncompressed (.wav) format.
Compressed formats themselves break down into two types:- lossless and lossy.
Lossless compression perfectly preserves the quality of your recordings. A wave file saved losslessly can be recovered with bit perfect precision. This type of compression therefore to be preferred for archiving.
Lossless compression however uses up a lot more disk space than lossy so if you are happy to accept a small decrease in quality you can achieve much greater compression ratios by using lossy compression such as ogg or mp3.
The track properties we assigned in the previous section ( title, artist, etc) can be used for naming your files. They can also be added as tag metadata to some file types. In the next exercise we'll learn how to name files using these tags.
Using Command Line Encoders
Wave Corrector is compatible with all DOS based command line encoders. Our links page has links to all the encoders directly supported by Wave Corrector. A good place to download other encoders is the Rarewares website.
Wave Corrector will generate a command line for you based on the parameters you set in the External Encoder section of the Compression Settings window:
The following tables show the default command lines that Wave Corrector will automatically generate.
Lossy Compression Encoders
| Encoder | File Name | File Extension | Command Line Suggestion |
|---|---|---|---|
| MP3 | lame.exe | .mp3 | --vbr-new -V2 --ta %A --tt %T --tl %L --tg %G --tn %N --add-id3v2 %IN %OUT |
| MP3 | fastencc.exe | .mp3 | %IN %OUT -br 160000 |
| MPC | mppenc.exe | .mpc | --standard --overwrite --artist %A --title %T --album %L --genre %G --track %N %IN %OUT |
| OGG | oggenc2.exe | .ogg | -q 7 -o %OUT -t %T -l %L -a %A -G %G -N %N %IN |
| AAC | faac.exe | .mp4 | -b 160 --artist %A --title %T --album %L --genre %G --track %N -o %OUT %IN |
| AAC | neroAacEnc.exe | .mp4 | -q 0.5 -if %IN -of %OUT |
| WMA | wm8eutil.exe | .wma | -input %IN -output %OUT -a_setting 160_44_2 |
Lossless Compression Encoders
| Encoder | File Name | File Extension | Command Line Suggestion |
|---|---|---|---|
| FLAC | flac.exe | .flac | -f -o %OUT -T TITLE=%T -T ALBUM=%L -T ARTIST=%A -T GENRE=%G -T TRACKNUMBER=%N %IN |
| WavePack | wavpack.exe | .wv | -h %IN %OUT |
Installing Encoders
To find an encoder, follow its download link on our links page. Most downloads are in the form of zip archives. Unzip the archive and save the contents to a folder called "Encoders" on your C drive.
The next time you run Wave Corrector, it will discover any new encoders you have installed and they will appear as options when you save files.
If you already have encoders installed elsewhere on your computer, you can use Wave Corrector's External Encoders command on the File menu to make them available to Wave Corrector.
Run the External Encoders command and click the Add button. Under "Path to Encoder", select the Encoder file you wish to use and click "Open". If the encoder is one that Wave Corrector recognises, it will fill in default values for the command line and file extension; otherwise you will need to fill these in yourself.








 Play From Start
 Play From Marker
 Cancel Playback
 Pause/Resume Playback



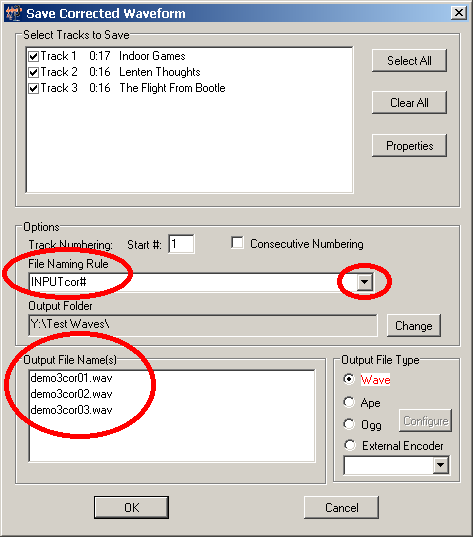
 symbol and select the rule, 'ALBUM\# - TITLE'; this means that the program will create a folder called ALBUM (in this case 'My First Digital Album' and place in it your three files # - TITLE; ie the file will be names will begin with their track number and be followed by a hyphen and their track title. Notice how the names in Output File Names box change to reflect the new rule.